Friday 28 August 2015

Counting the Stitches

I'm still stitching away on the patchwork mentioned in a previous post.


After cutting out the hexagon template papers and the fabric then tacking the fabric to the papers, I've been assembling them into blocks consisting of 39 hexagons which will later be all joined together into a quilt. Each edge of the hexagon requires an average of 20 tiny hand-stitches to secure it to it's neighbour.


Some simple maths tells me that, having constructed 11 blocks so far, I've worked 20,460 stitches!


Wednesday 26 August 2015

The Seersucker and Lace Top

So, you remember the seersucker fabric I bought for $1 last week? There was less than a metre in the piece which was a big restriction on what could be made but I'm happy with the outcome.


I used the Simplicity No 6410 (again) as a base pattern and added the gathered peplum.


A hand-stitched loop and button provide the neck closure. There was not enough fabric for facings so I made up a half lining in white lawn.

The trimmings came from my vintage button collection and the lace box.


Now I'm waiting for summer in Australia so I can wear it!


Tuesday 25 August 2015

Duffle Coat for Tiny Tots

Duffle coats are under discussion with the competition winner about to be announced at Sew Mama Sew. Here's a mini one I made recently for the 16 month-old grandmunchkin.


The fabric is a cosy velour and the body and hood are self lined making it extra warm.


I used this 1998 Butterick pattern No 5713, leaving off the pockets and the elastic around the hood and adding the toggle fastening. The fabric was a $4 charity shop find and there was enough left over to make this comfy bed for Puss!


Friday 21 August 2015

Simplicity 6410 (again)

It seems I just can't move on from Simplicity No 6410.


I did try, but as mentioned in the previous post I was working with very little fabric. I pulled out patterns with sleeves, collars, tie necklines, none of which was an option with less than a metre of fabric to work with. The reason I settled on 6410 was that it at least provided a cap sleeve. Not a complete camouflage for my less than youthful arms, but better than no sleeve.


I'm making this up as I go along so the next post will reveal how it all turned out. So far I've cut it out with a back seam which will be open at the top and fasten with a loop and button, no collar, no front opening just a lace-edged panel, an ever-so-slightly-gathered peplum, and the cap sleeve.


So far, so good …

Wednesday 19 August 2015

Fabric Find of the Week


My charity shop fossicking this week turned up a pretty striped seersucker for $1. It's only a small piece, 45 inches (115 cm) wide by 36 inches (92 cm) long with a corner about 12 inches (30 cm) square missing. I'm thinking a summer blouse with some lace maybe, and perhaps a few of my vintage buttons.


At the moment I'm liking the one on the bottom right if I can find enough of them in the button box.

Friday 14 August 2015

How to Make a Secateurs Pouch

As a garden designer I spent many years not only designing gardens but working in them. Digging, planting, pruning. Every workman, sorry, workperson, knows that having tools to hand makes a job a lot quicker and easier to accomplish. I'm always surprised, therefore, that more gardeners don't own a secateurs pouch. My first one was a builder's leather nail pouch. When it wore out I used a heavy canvas pouch. It finally succumbed to the pointy end of the secateurs so time for a new one.


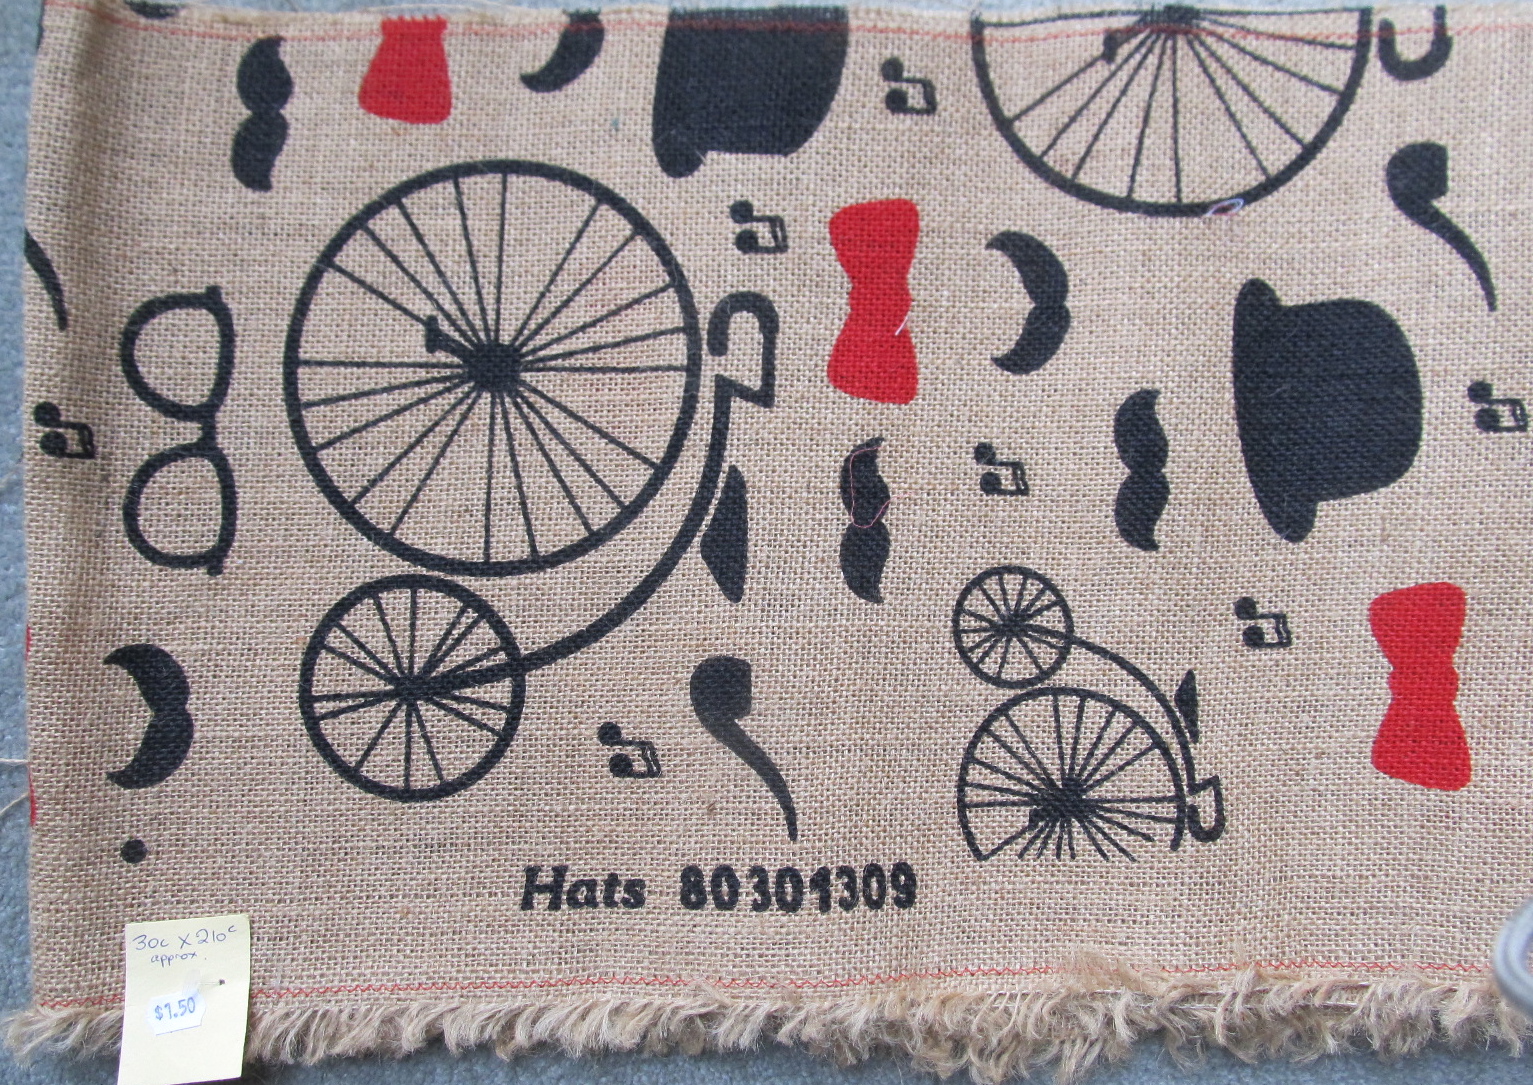
I found this quirky hessian at the charity shop: 2 metres long by 30 cm wide for $1.50. I had some leatherette in the box from a previous project and some black cotton twill for a backing.

It's quite easy to make following these directions.


These are the component parts: a front section in hessian, a back section in heavy cotton, a lining in leatherette, the belt in hessian and heavy cotton, plus the binding.


All these measurements include a 1/2 inch (13 mm) seam allowance.


The pouch bulges out in the front so you can easily get to your secateurs and gloves. That means the back is tapered into the place at which it joins the belt. The side seams are finished with a binding as the hessian and leatherette are too bulky to turn through as you would a normal seam.


Start by sewing the front to the back at what will be the bottom of the pouch. Press seam allowance to the front and topstitch in place.


Turn over the ½ inch (13 mm) allowance at the top edge of the front and the same for the leatherette. Now sandwich the two together and topstitch close to the edge. Stitch a second row for a nice firm edge.


Stay stitch the outer fabric to the leatherette stopping about 1 inch (25 mm) before the bottom seam at both front and back. 


You'll notice there is some play in the outer fabric when it's lying flat but it is taken up when it curves to form the pouch.


The side seams come next. The leatherette, being in one piece, will curve at the bottom of the pouch but should pose no problem. Line up all four layers and pin along seam line. Pin both sides before you sew to make sure it's not skew-whiff. Stitch side seams.


The binding to cover the raw edges is not cut on the bias. Having cut the two 2 ½ inch (6.5 cm) wide strips, turn in the long edges by ½ inch (13 mm) on each side to create the binding, pressing them firmly in place. Open out one edge and stitch to pouch on front side.


Turn the bottom edge of the binding up tucking it in to cover the raw edge and stitch in place.


With the front of the pouch uppermost, finish the binding by stitching 'in the ditch' making sure that it catches the binding at the back of the pouch. Repeat on second side.


Now you're ready to add the belt.


To make the belt, with right sides together stitch along the two short ends and one long side. Turn through and press flat.

Because the hessian is stiff, it is easier to sew the final long edge from the right side. Turn in the seam allowance and press and pin in place.


Mark the length in the centre of the belt where the pouch will fit and leave a gap to insert it then top stitch the long edge up to the gap on both sides.


Insert the back seam allowance of the pouch into the gap in the belt and stitch.


Make sure you catch in the backing fabric.


Add a second row of stitching along the whole length of the belt.


Cut a 3 inch (7.5 cm) length of wide velcro and stitch in place to fit comfortably over your gardening togs.


Now, time for some gardening I think. (That's a real dove in my birdbath!)

Monday 10 August 2015

Watch This Space …

Soon I'll be putting up the instructions for making this cute pouch lined in leatherette for secateurs and garden gloves. This was the first model, the updated model is more open to allow easier access to the tools.


As usual, I picked up this hessian as a charity shop bargain: a 2 metre length 30cm wide for $1.50. That quantity makes four pouches.


Want to make a few for gardening-loving friends for Christmas? Full instructions later in the week.

Saturday 8 August 2015

Fabric Find of the Week

My fabric find this week is destined to become a pair of summer slacks. It's still very wintry here in Australia so no rush to get them made.


It was a fantastic charity-shop bargain at $6 for a 2 ½ metre length of what appears to be a woven polyester.


And it happens to be a perfect match for the buttons on the Blue Peter Shirt. Maybe it will be too dark in colour to wear with the shirt but we'll see.

Wednesday 5 August 2015

Embroidery Revisited

Embroidery has never been one of my things. I guess I have to have a practical application for the projects I undertake, and embroidery on clothes always says 'hippy' to someone my age. 

My mum's greatest joy as a young woman in the 1920s was painting and embroidery. When I was a child my bed had a beautiful cream linen coverlet that she had embroidered with bluebirds.


This matching pillow sham is still in my linen cupboard.

A friend signed up for an embroidery course at our local Neighbourhood House last year and I decided to join her for the heck of it.


I wasn't completely clueless about basic embroidery stitches but learning to do the bullion rose was quite a challenge.

Having completed the three-week course, I had to find something to embroider. My sixth grandchild was on the way at that time so I thought it a perfect opportunity for a bit of embroidery. The difficulty was what to embroider as we were expecting a boy baby.


I'd already made a bunny rug and chain stitched a bear onto it.


I tried out a boat on my sampler.

Then I had the bright idea of embroidering a set of bibs featuring the images in that classic children's book, Very Hungry Caterpillar.


I drew up the shapes to the size I wanted, traced them onto tissue then marked them onto the bibs by piercing through the tissue with the point of a biro (there must be an easier way?).


Some were more successful than others but all in all I was pretty happy with the result. 


The VHC himself was, I thought, a triumph (it's not easy to embroider a face on a tiny caterpillar!).


An evening spent with needle and thread is an evening well spent.